
การประกอบเครื่อง
P2S
P2S, Tool Box, Spool Holder Assembly, Touchscreen, PTFE Tubes, Power cable.
|
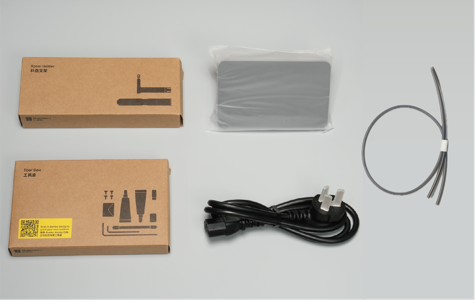
Note: The power cable is located in the top accessory box of the chamber.
ขั้นตอนการเอาเครื่องออกจากกล่อง
แกะกล่อง
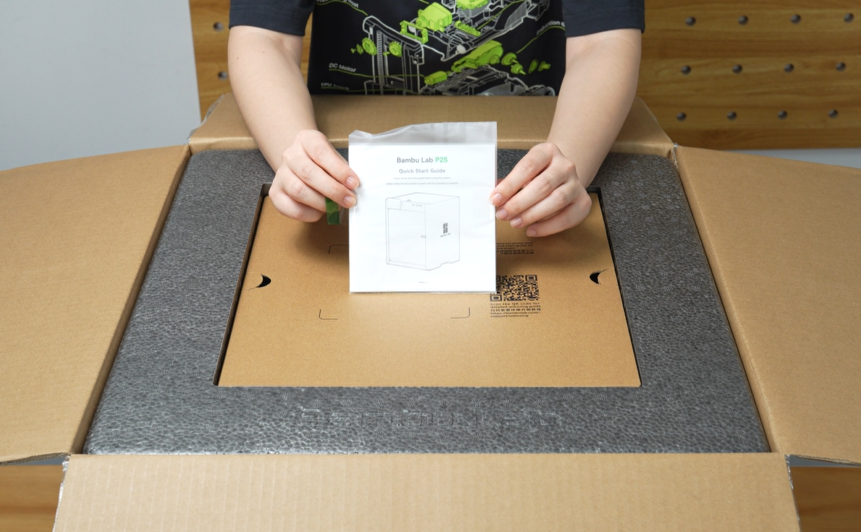
เมื่อเปิดกล่องมาแล้วจะเจอกับคู่มือ Quick Start Guide ภาษาอังกฤษ แนะนำให้อ่าน หรือสแกน QR code เพื่อดูวิธีการประกอบ ให้ทำการหยิบแผ่นกระดาษลังที่ปิดด้านบนออก แล้วนำ PTFE / กล่องเครื่องมือ และโฟมป้องกันด้านบนออก
ยกเครื่อง
หลังจากนั้นให้ทำการยกเครื่องออกจากกล่อง ซึ่งตัวเครื่องจะอยู่ในถุงพลาสติกใบใหญ่ ไม่ต้องแกะถุงพลาสติก ให้ทำการดึงถุงพลาติก พร้อมเครื่องขึ้นมาได้เลย
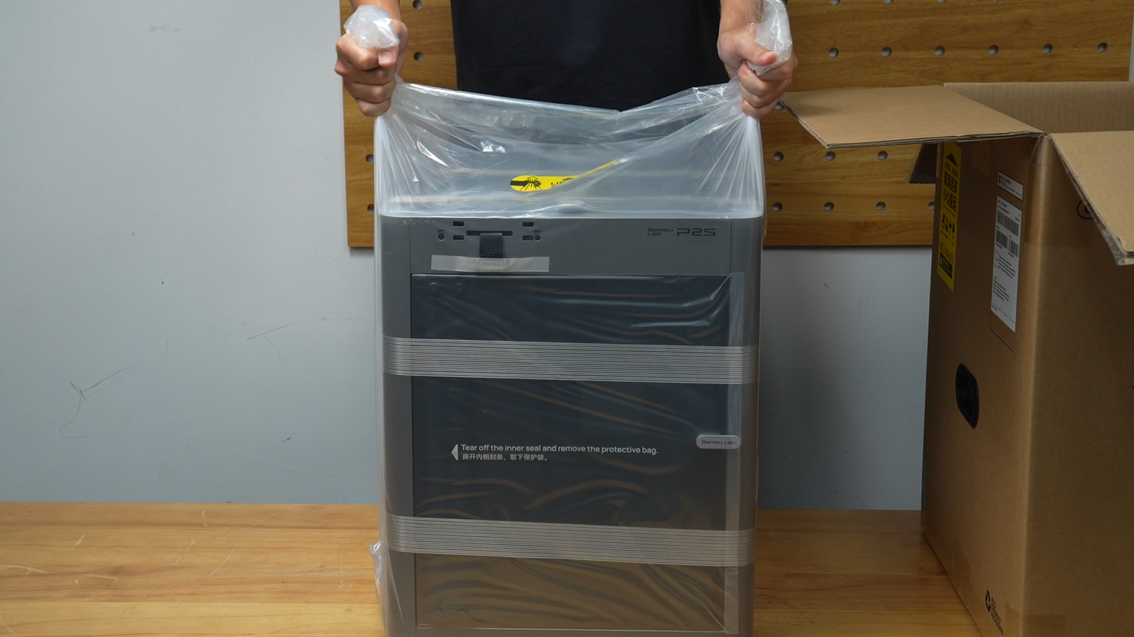
หลังจากยกเครื่องขึ้นมาได้แล้ว ให้ทำการนำเครื่องออกจากถุง และแกะเทป รอบตัวเครื่องออกให้หมด
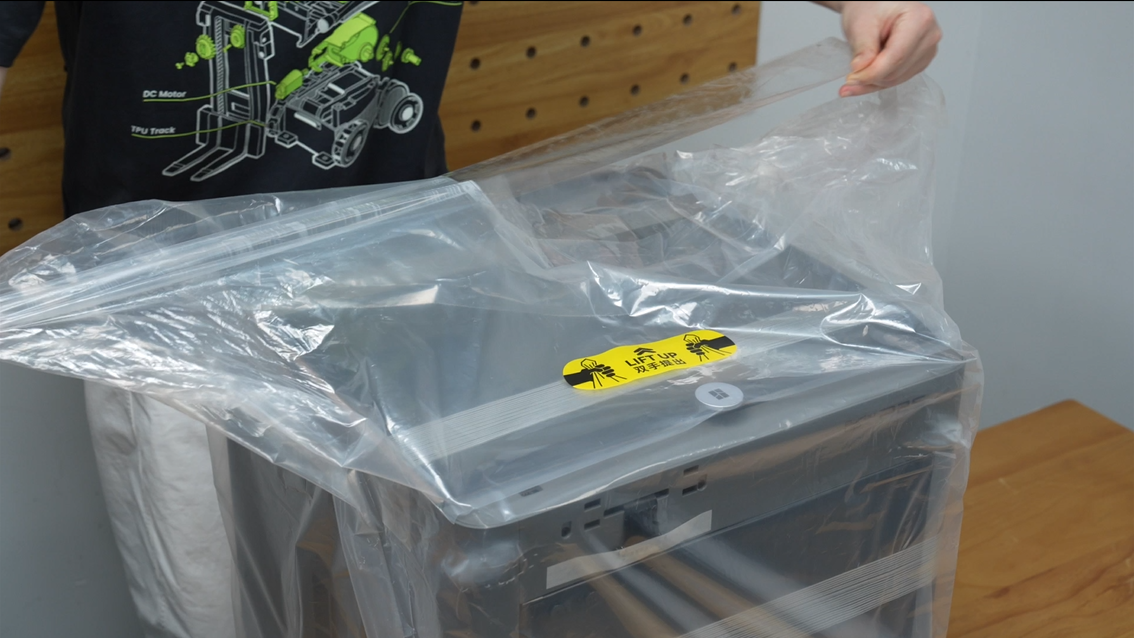
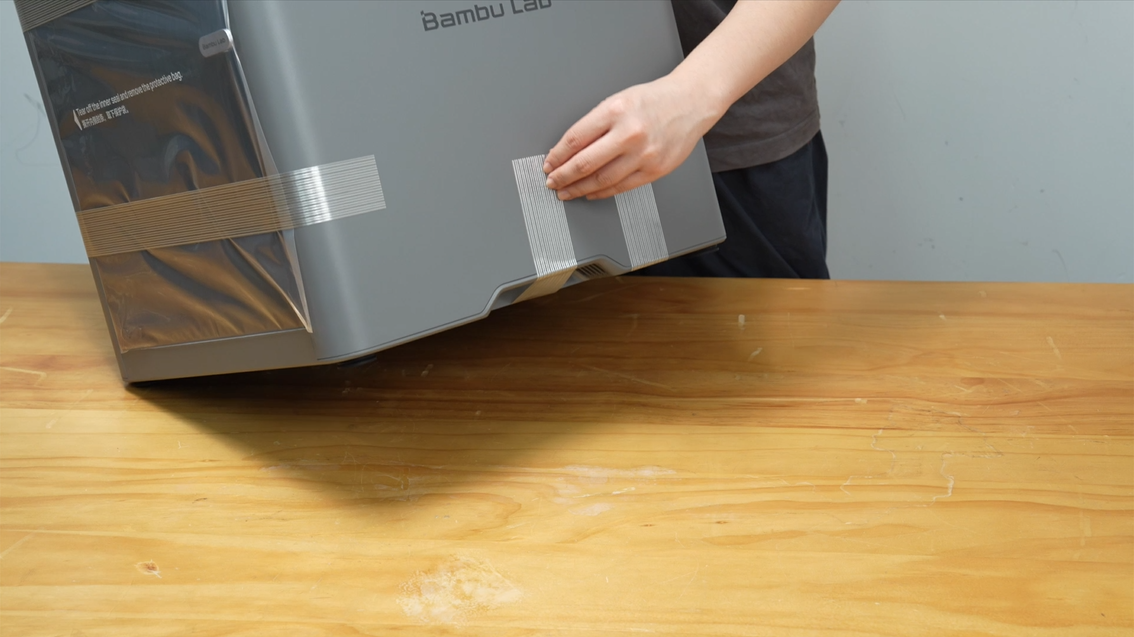
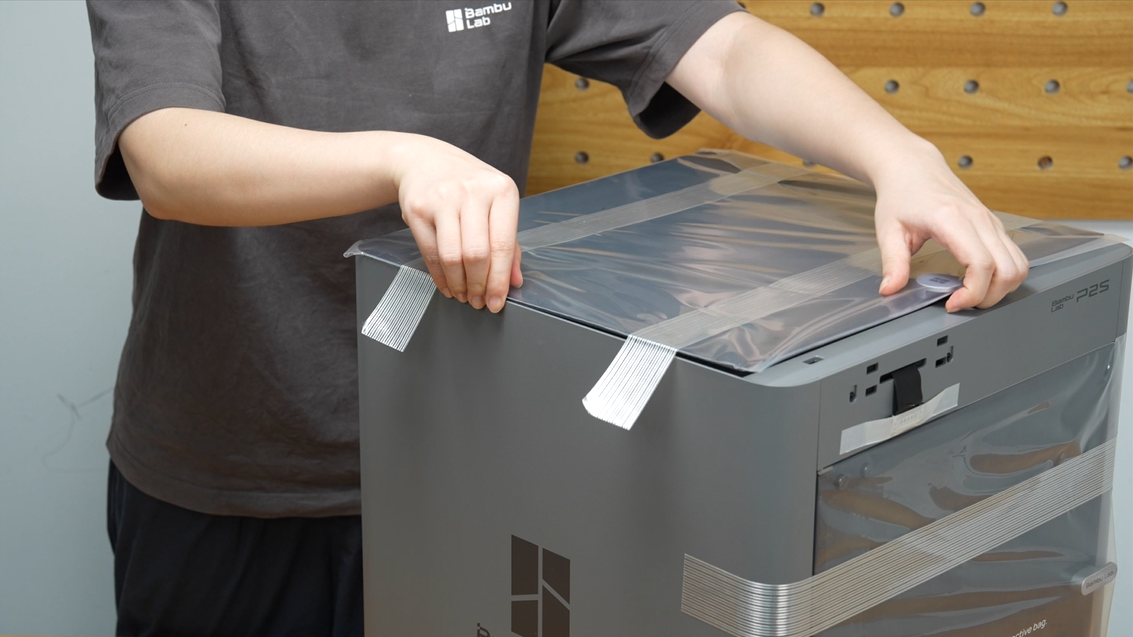
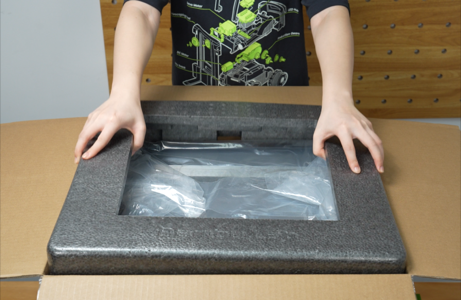
แกะเทปด้านบนเพื่อนำฝาปิดกระจกด้านบนออก ตรงนี้ให้ระวังหน่อยเพราะฝาเป็นกระจก อาจจะแตกได้ เวลาวางฝา ให้หาที่เรียบๆ ในการวาง เมื่อเอาฝากระจกออกแล้ว ให้เอาออกจากห่อพลาสติก ใต้ฝากระจก จะมีอุปกรณ์สำหรับประกอบเครื่อง พร้อมหน้าจอ Touch Screen และตัวแขวนเส้นพลาสติก
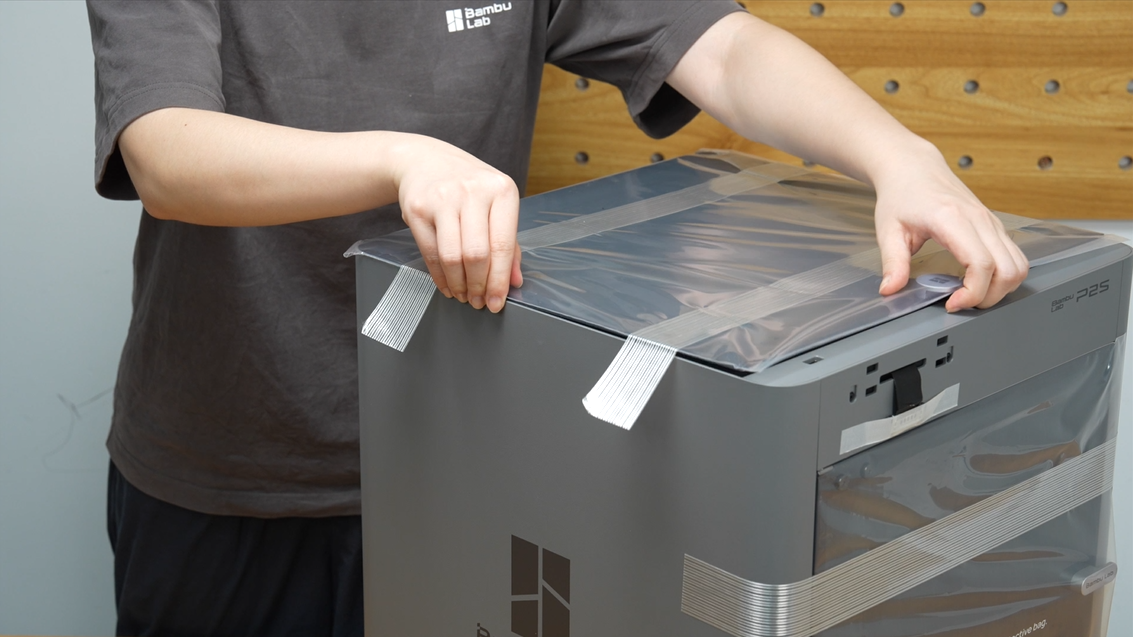
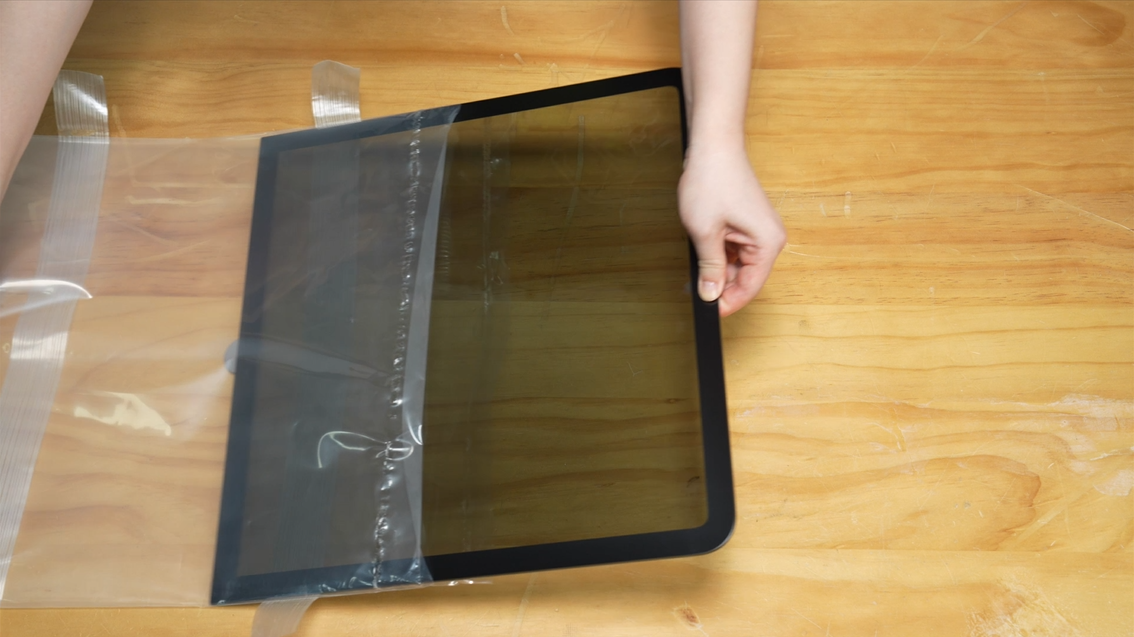
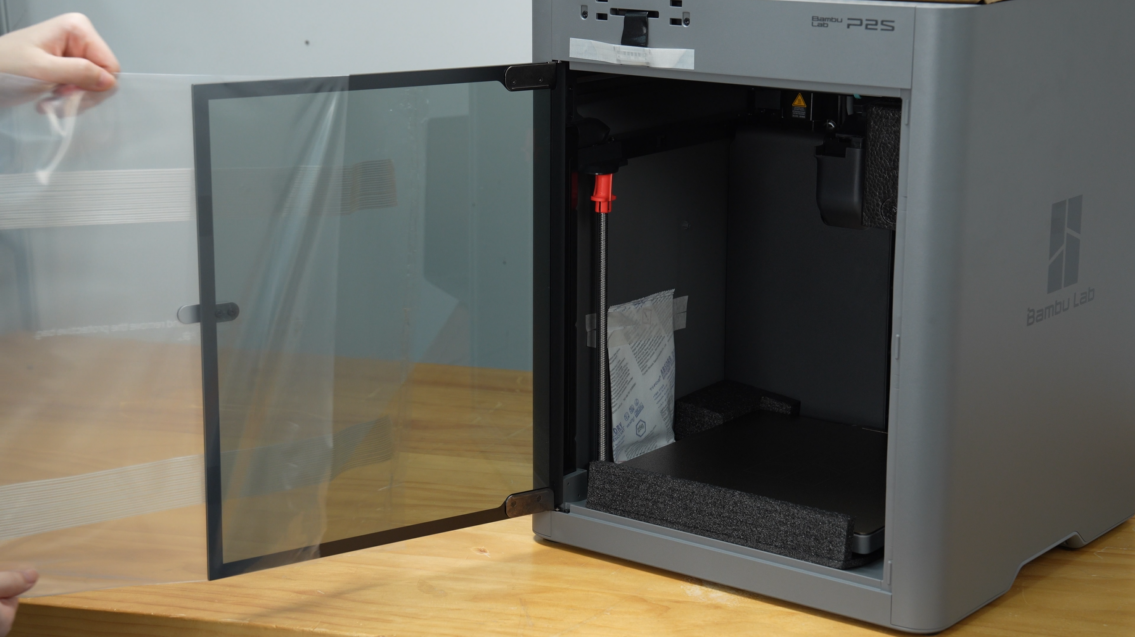
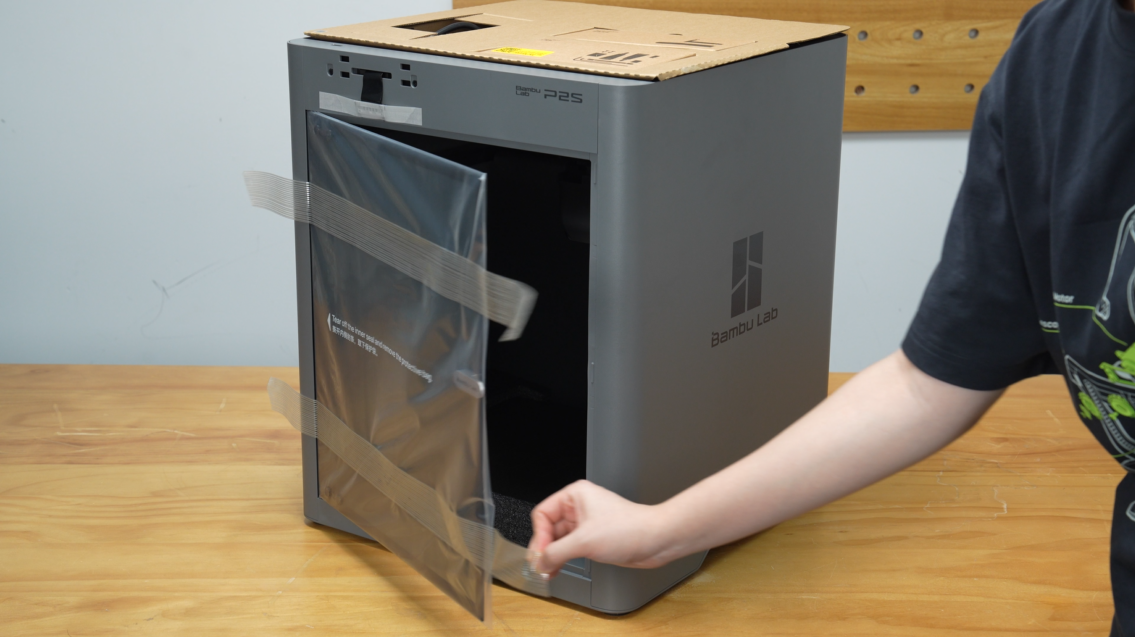
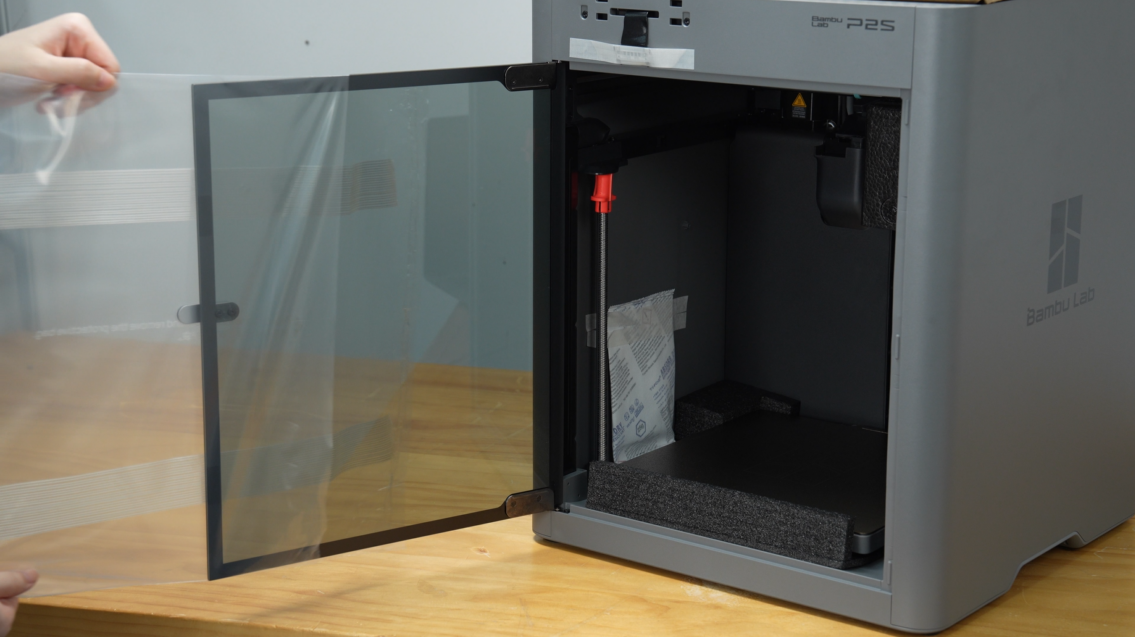
ต่อไปให้แกะห่อพลาสติกที่ปกป้องฝากระจกด้านหน้าออก
สำรวจอุปกรณ์และประกอบหน้าจอ
ต่อไปให้นำอุปกรณ์ทั้งหมดออกมา ซึ่งจะประกอบไปด้วย เครื่องมือประกอบและอะไหล่สำรอง
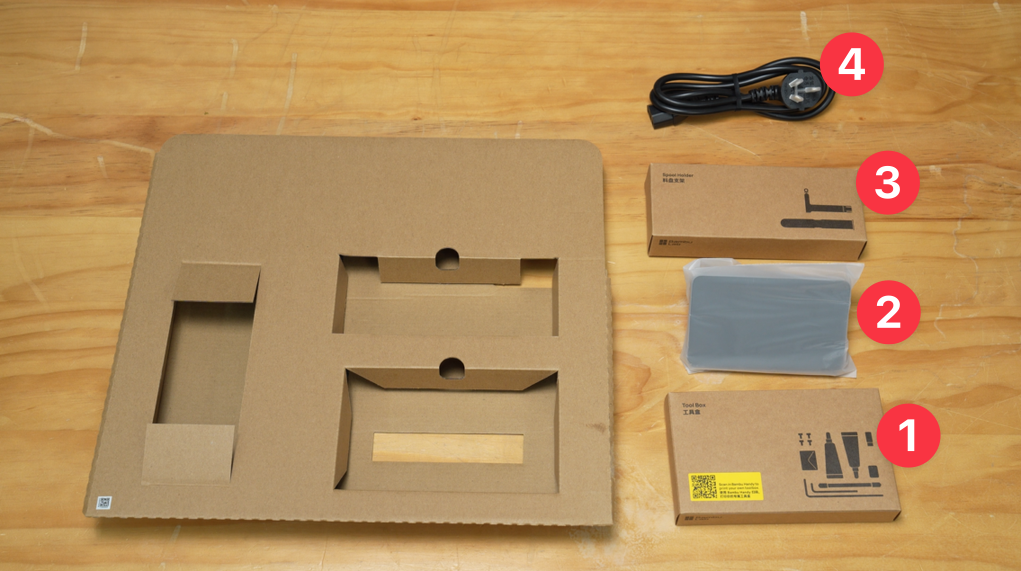
- กล่องเครื่องมือประกอบและอะไหล่สำรอง
- หน้าจอ Touch Screen
- ตัวแขวนเส้นพลาสติก
- ปลัีกไฟ
ขันน็อตล็อคฐานออก
ข้้นตอนนี้สำคัญมาก ต้องทำห้ามลืมเด็ดขาด น็อตยึดฐานจะมี 3 ตัว หน้า 2 ตัว ตามมุมซ้าย และขวา และ 1 ตัวตรงกลางด้านหลัง ประแจที่ใช้เอาออกจะอยู่ในกล่องเครื่องมือ เป็นประแจตัวยาว
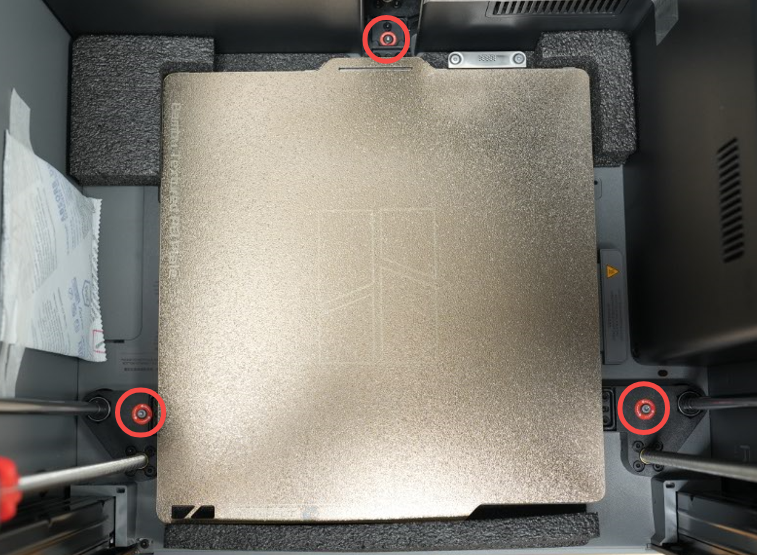
ตอนขันน็อตตัวหลัง ให้ระวัง เพราะตัวน็อต ตอนขันใกล้จะหลุด อาจจะตกลงไปช่องข้างหลังเครื่อง ถ้าเกิดแบบนี้ แนะนำให้ใช้แหนบ หรือไขควงแม่เหล็ก ในการดูดเอาน็อตที่ตกออกมา
สำหรับโฟมที่ อยู่ใต้ฐาน ยังไม่ต้องเอาออกมา ให้ปล่อยไว้ก่อน โฟมส่วนนี้จะเอาออก ตอนที่เปิดเครื่อง และทำการ Carlibrate เครื่อง
แกะเทปและเอาตัวป้องกันทั้งหมดออก
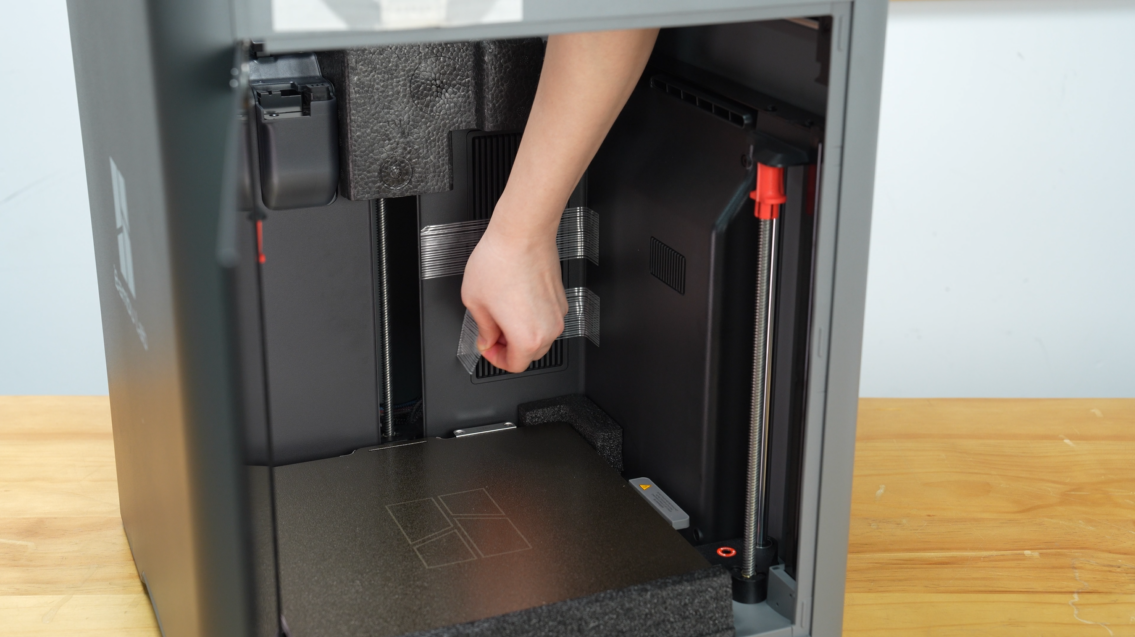
ต่อไปให้เอาตัวดูดความชิ้น ถุงสีขาวออก รวมถึงเทปที่แปะอยู่ในส่วนของช่องใส่กรองอากาศด้านหลังออกให้หมด
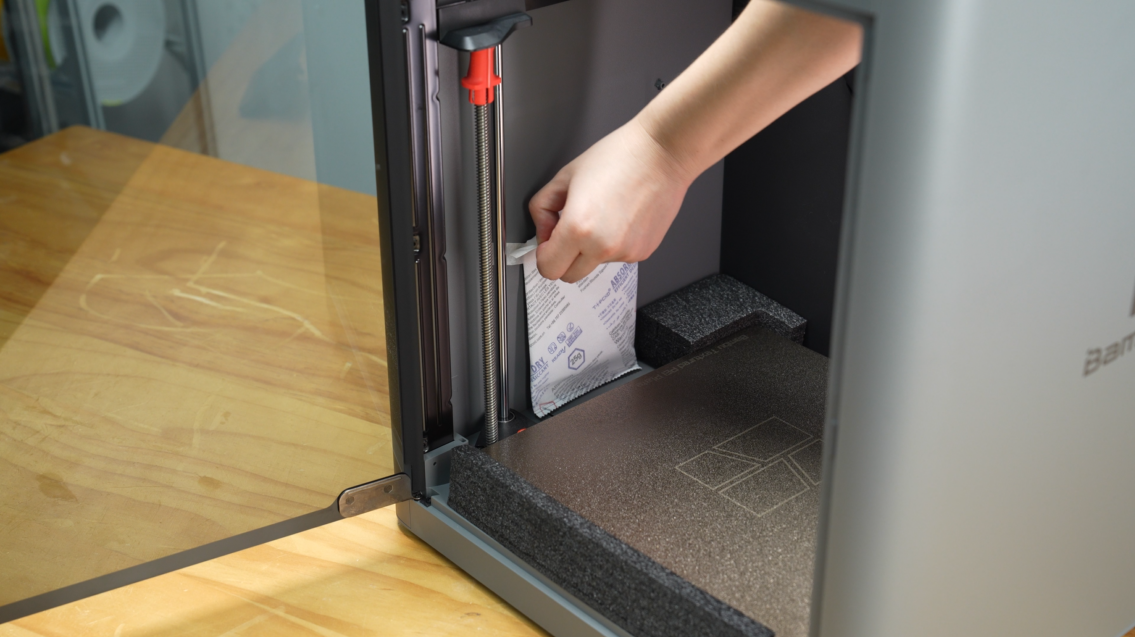
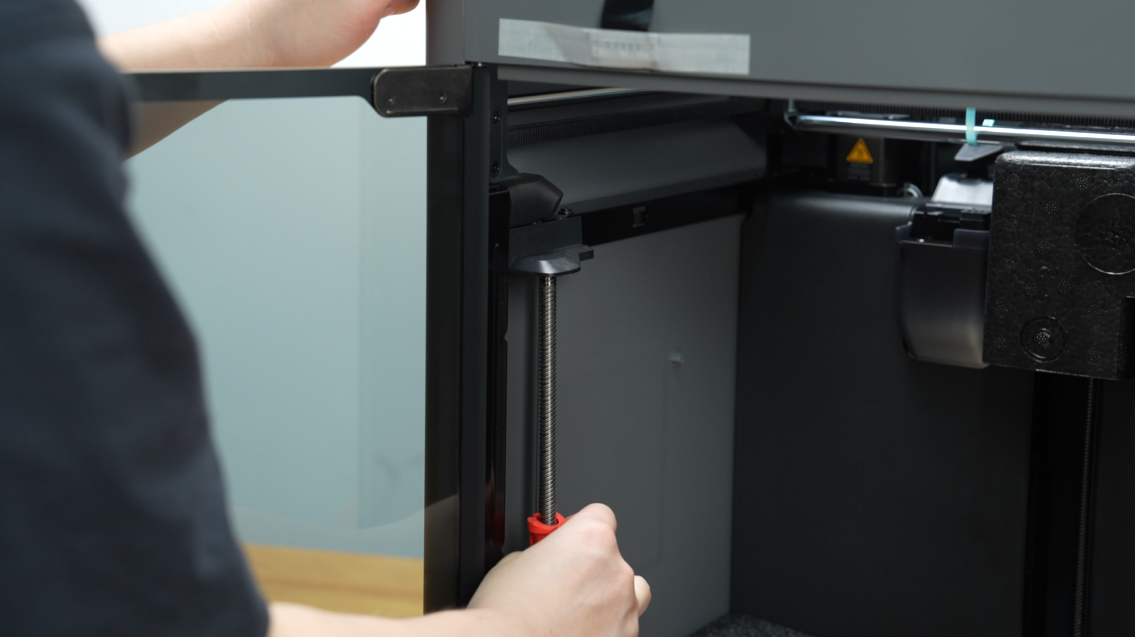
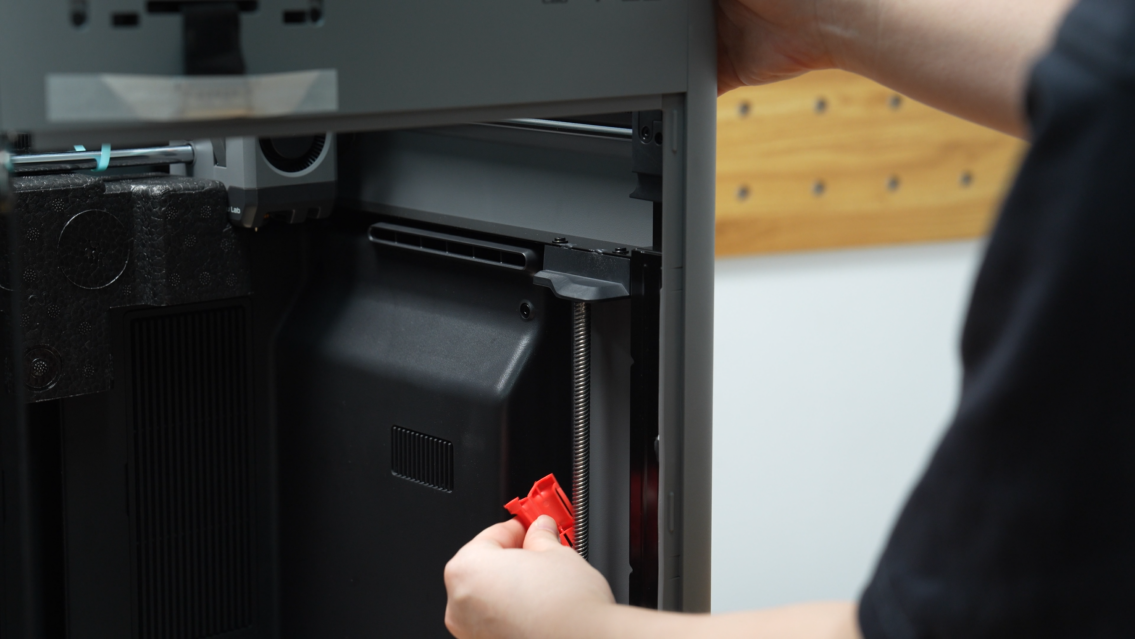
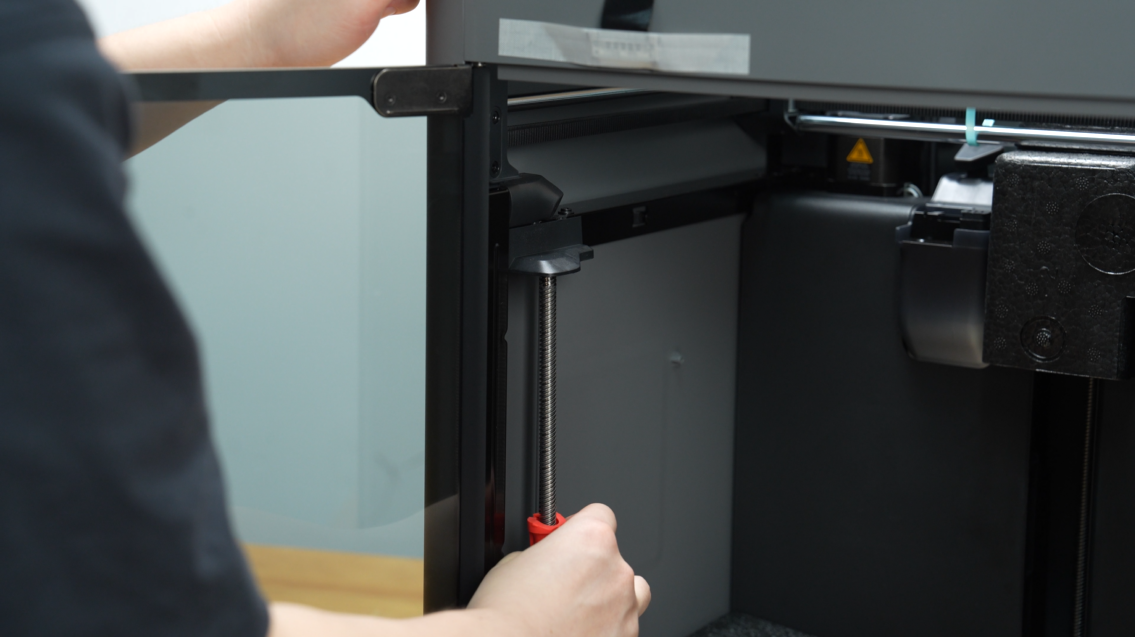
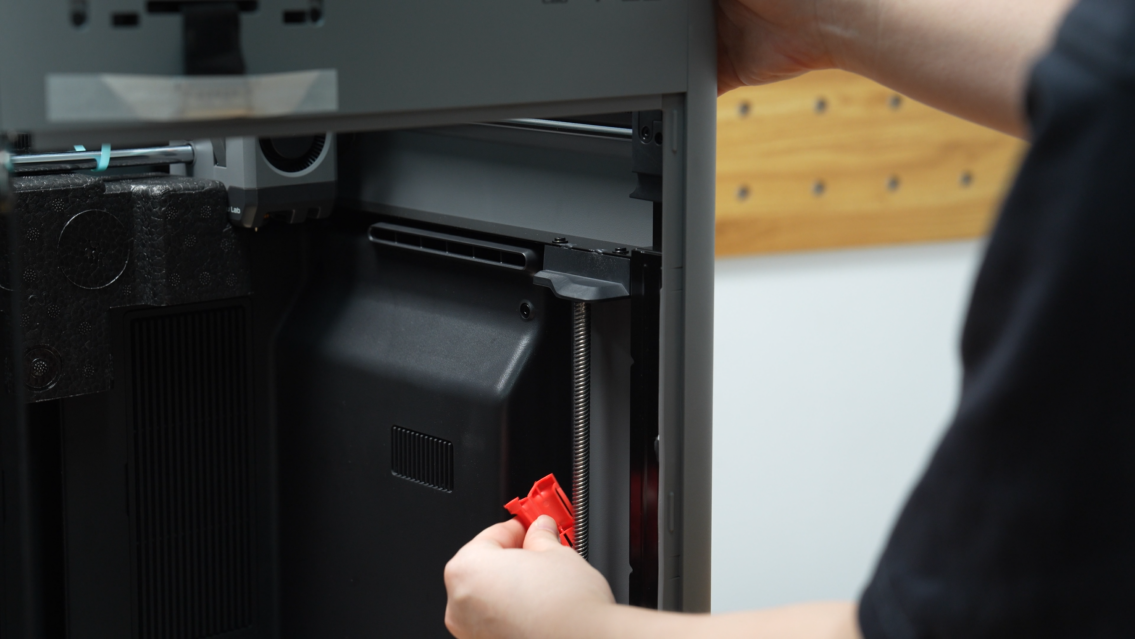
หลังจากนั้นให้เอาตัวป้องกันเกลียว สีแดง ที่อยู่ด้านหน้าเครื่องทั้ง 2 ฝั่งออก เวลาเอาออกให้ ใช้มือดึงลงแรงๆ ได้เลย
ทำการตัดสายเคเบิ้ลที่ชุดหัวฉีด
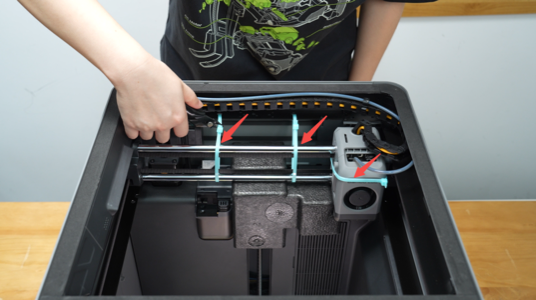
ก่อนที่จะขยับหัวฉีด ให้ทำการตัดสายเคตเบิ้ลไทด์ออก ซึ่งจะมีด้วยกัน 3 ชิ้น 2 ชิ้นแรก จะล็อคแกน X ส่วนอีกชิ้น จะล็อคฝาครอบหัวฉีด ให้ทำการตัดตัวเคเบิ้ลไทด์ที่รัดแกน X 2 เส้นก่อน
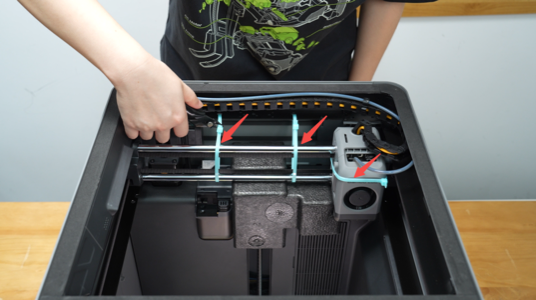
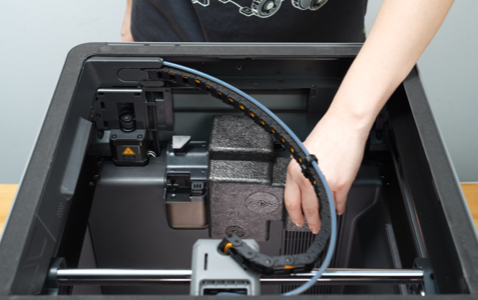
เมื่อตัดเสร็จ ให้ขยับหัวฉีดไปด้านหน้า จะได้มีพื้นที่ ในการตัดเคเบิ้ลไทด์ ที่่รัดฝาครอบหัวฉีด และให้เอาโฟมที่ป้องกันด้านหลังออกด้วย
ติดตั้งหน้าจอ Touch Screen
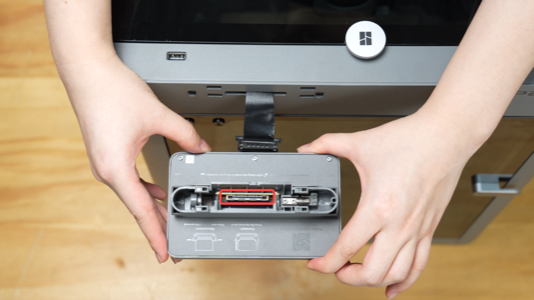
ก่อนการติดตั้งหน้าจอ ให้สังเกตุตัวหนังสือ และเขี้ยวล็อค ว่าอยู่ถูกด้าน เวลาเสียบสาย Connector จะได้เสียบได้ลงพอดี ก่อนที่จะทำการติดตั้งหน้าจอไปที่เครื่องจะต้องเสียบสายก่อน โดยสาย Connector สามารถที่จะดึงออกมาได้นิดนึง เพื่อให้ง่ายต่อการเสียบ
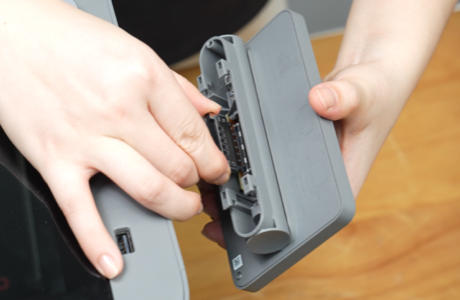
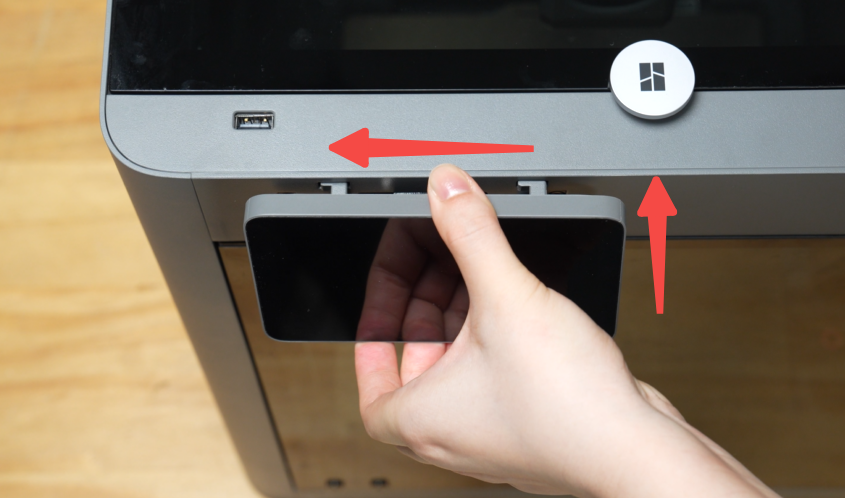
หลังจากเสียบสาย Connector แล้ว ให้ทำกาติดตั้งหน้าจอ เข้าไปที่ตัวเครื่อง ซึ่งขึ้นตอนนี้ ไม่ต้องใช้เครื่องมือ สามารถนำหน้าจอ ใส่ลงไปในร่อง แล้วด้นไปทางซ้าย เพื่อล็อคหน้าจอเข้ากับเครื่อง
ตอนใส่หน้าจอลงไปในร่องให้ระวัง อย่าให้สาย Connector พับมากเกินไป สามารถใช้มือดัน สาย Connector สอดเข้าไปได้นึดนึง
ติดตั้งตัวแขวนเส้นพลาสติก
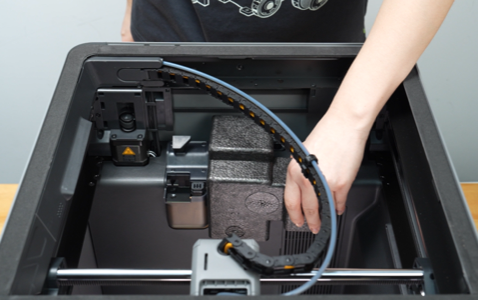
ในส่วนของตัวแขวนเส้น จะให้มา 2 ชิ้น ซึ่งต้องประกอบเขาด้วยกันก่อน ตอนประกอบ ไม่ต้องใช้เครื่องมือ สามารถนำ 2 ชิ้นมาเสียบเข้าด้วยกันได้เลย เมื่อประกอบเสร็จ ก็ให้ทำการ สไลด์ตัวแขวนเส้น เข้าไปที่พลาติกแผ่นสีดำด้านหลัง
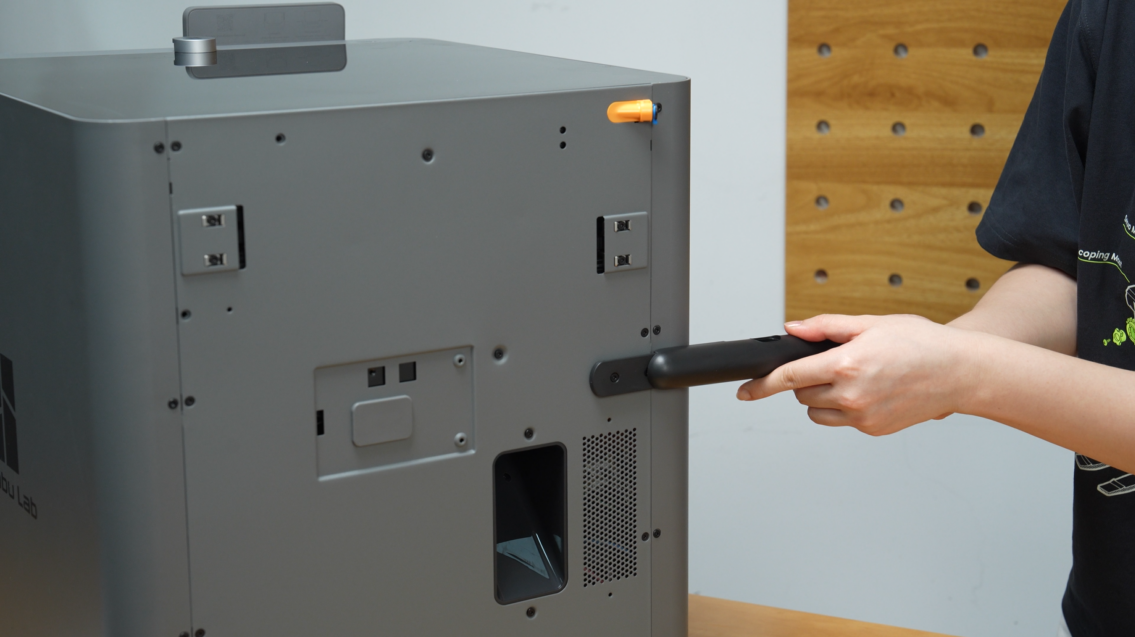
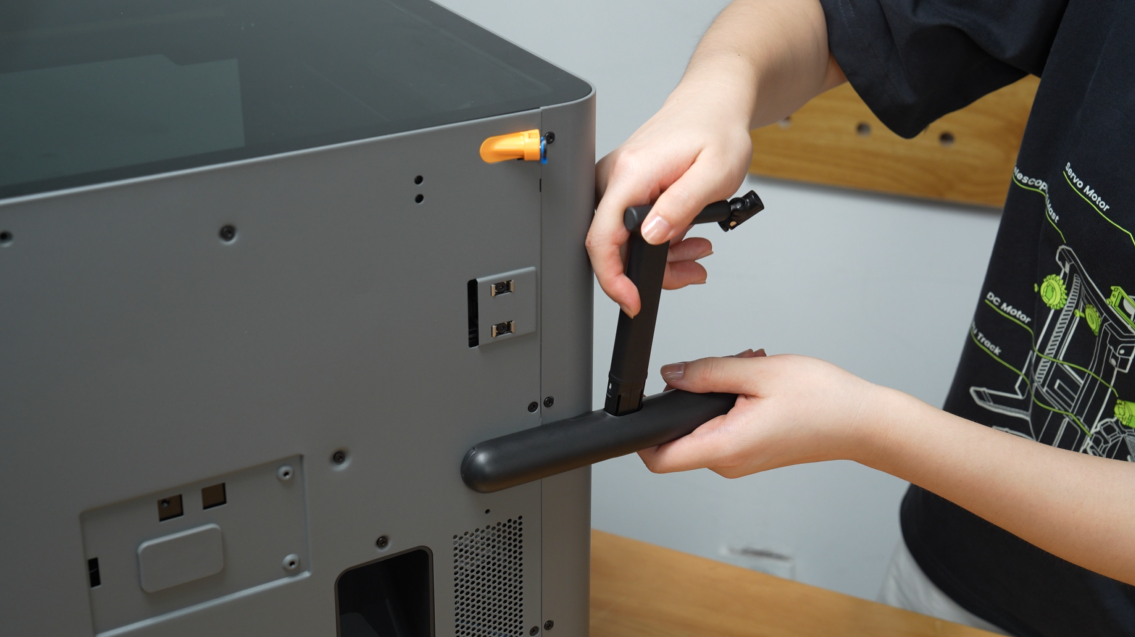
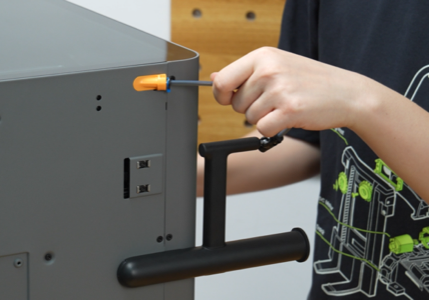
เสียบท่อ PTFE ที่มากับเครื่อง เข้ากับ fitting ตัวแขวนเส้น ส่วนอีกด้านเสียบเข้าช่องสีเหลือง เวลาเสียบ ให้เสียบให้สุด จนไม่สามารถดันท่อได้่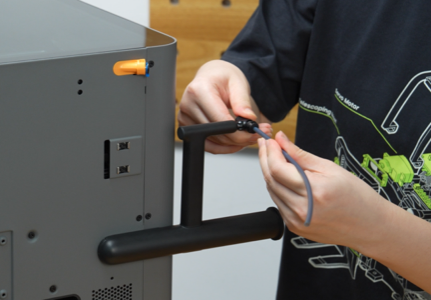
เสียบปลั๊กแล้วเปิดเครื่อง
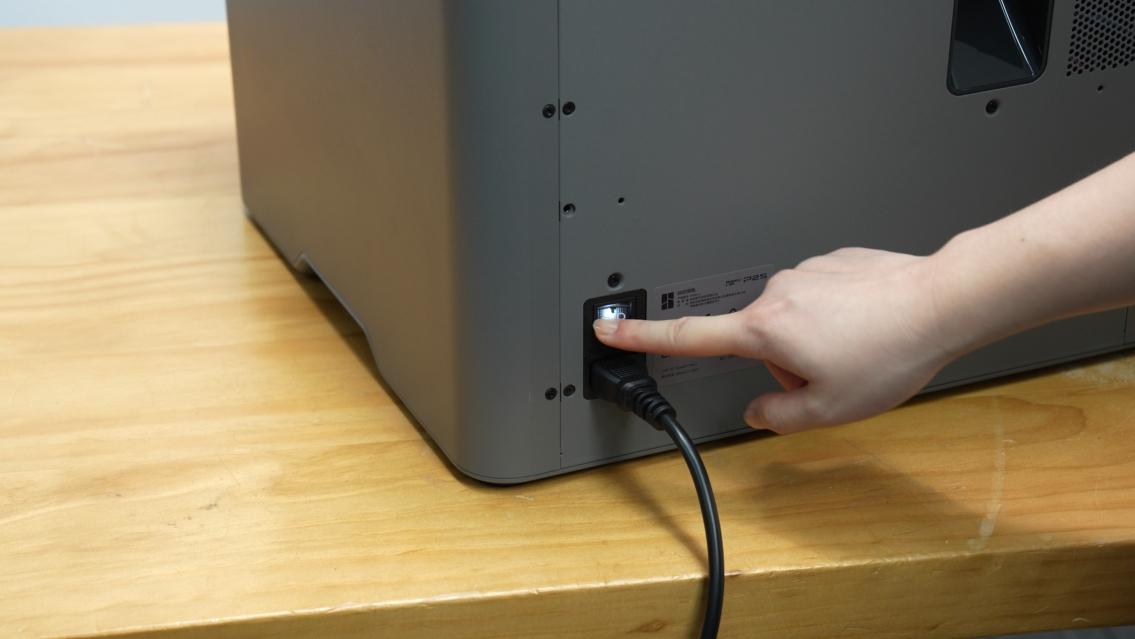
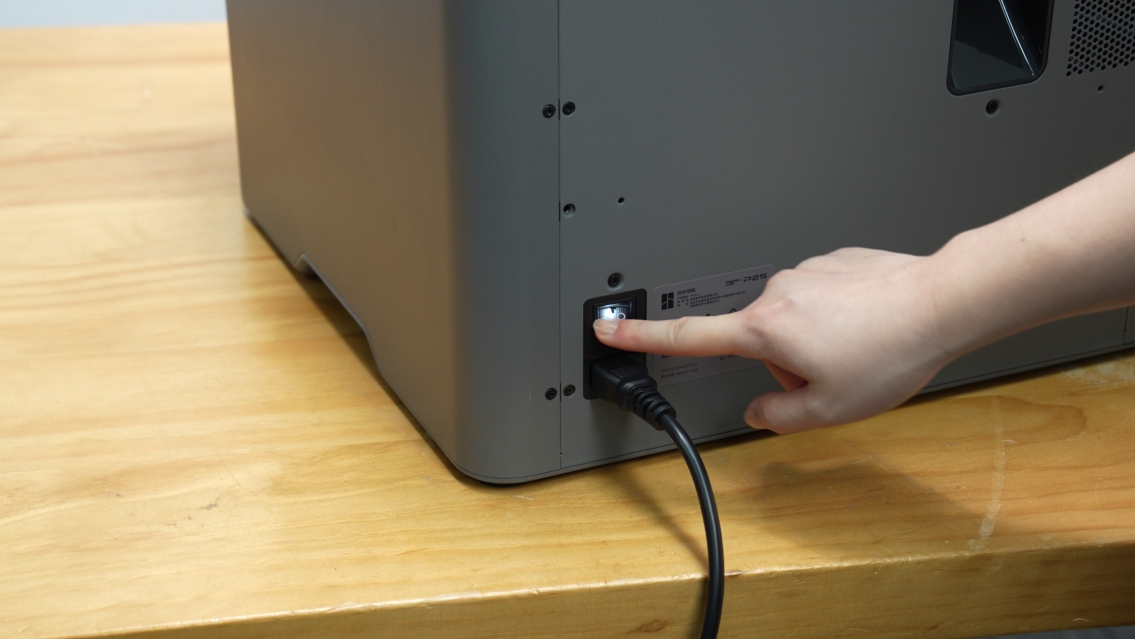
หลังจากประกอบทุกอย่างเสร็จแล้ว ให้เสียบปลั๊กจ่ายไฟ เข้าหลังเครื่องและเปิดสวิตช์เครื่องได้เลย เมื่อเปิดเครื่อง ตัวเครื่องจะให้เลือกภาษา และ Region หรือทวีปในการใช้งาน ตรงนี้ให้เลือกเป็น Engliah และ Asia Pacific จากนั้น ตัวเครื่องจะให้ต่อ Wifi ตรงนี้สามารถ Skip และมาทำที่หลังได้ แต่ทางร้านแนะนำให้ ต่อ Wifi ไปเลย จะได้ทำการผูกเครื่องเข้ากับบัญชี Bambu Lab ที่สร้างผ่าน App Bambu Handy เพราะถ้าผูกเครื่่องแล้ว หลังจาก Calibrate เครื่องจะทำการเช็ค ว่ามี Fimeware ตัวใหม่ ไหม ถ้ามี ก็กด Update ได้เลย
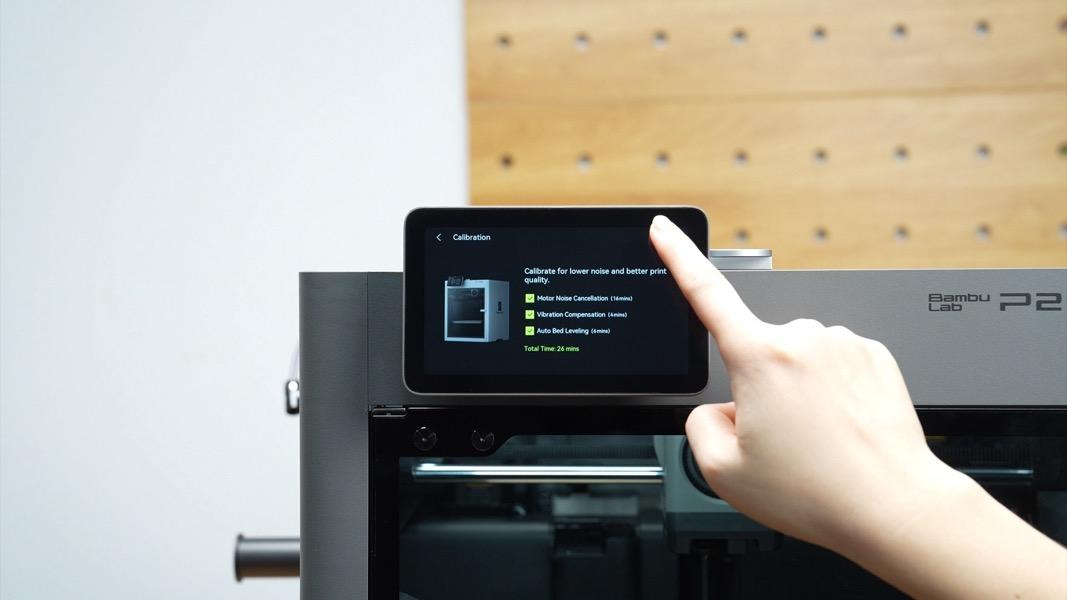
หลังจากผูกบัญชี หรือ กด Skip ตัวเครื่องจะทำการเข้าสู่โหมด Full Calibration ซึ่งจะใช้เวลาประมาณ 30 นาที ในส่วนนี้ ให้เลือกติ๊กถูกทั้งหมด และกด Start ได้เลย
ก่อน Calibrate ต้องแน่ใจว่มีฐานพิมพ์วางอยู่บนเครื่อง ก่อนกด Start
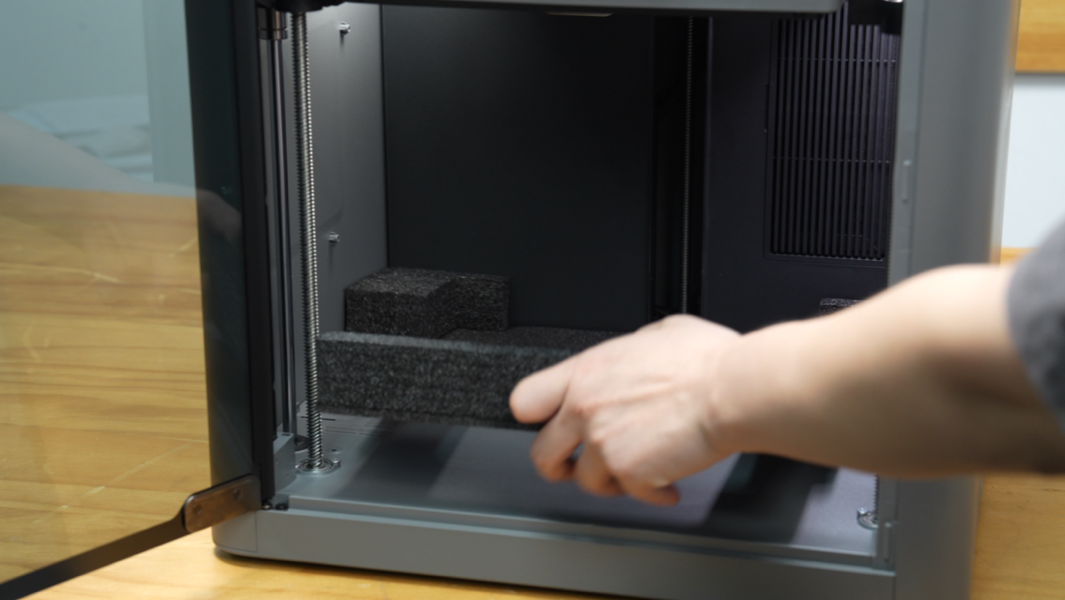
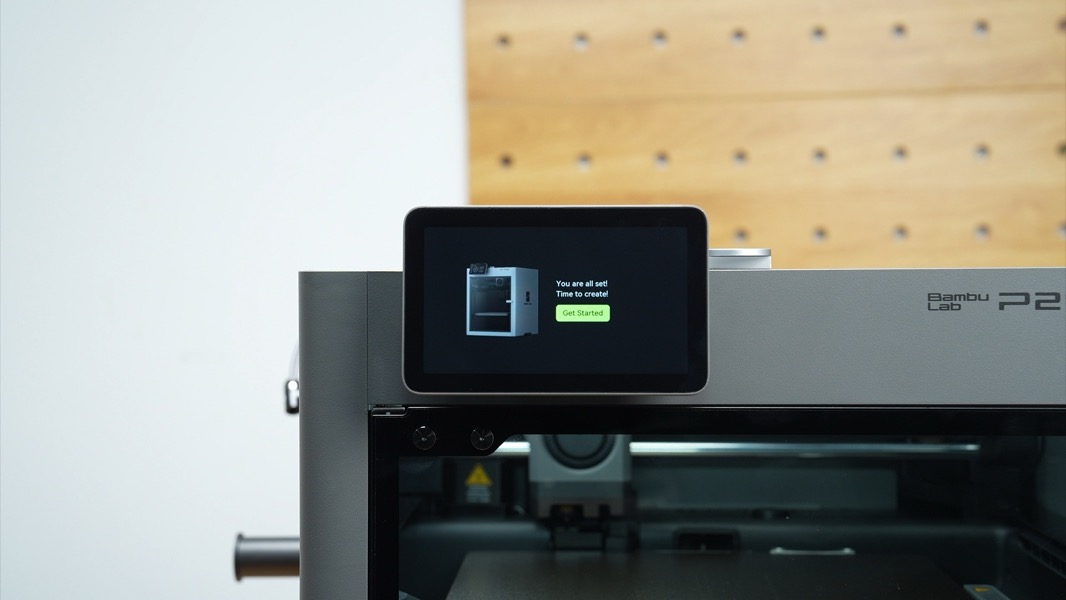
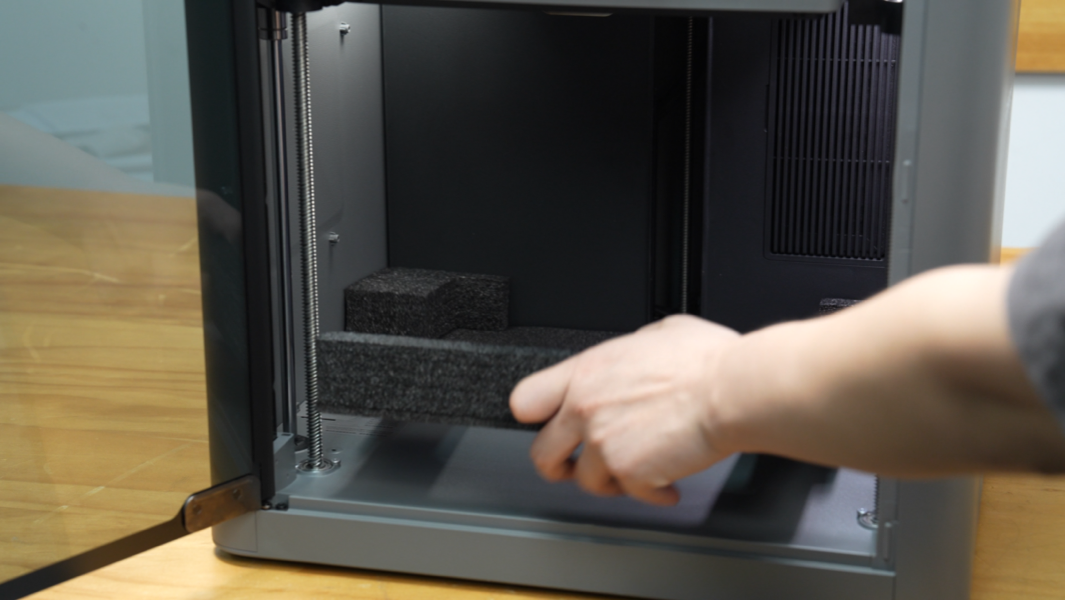
หลังจากเครื่องทำการ Calibratrion เสร็จแล้ว ให้นำโฟมที่อยู่ด้านใต้เครื่องออกให้หมด แค่นี้ ตัวเครื่องก็พร้อมใช้งานแล้ว
Remove the cardboard, take out the PTFE tube, and then remove the top foam.
|
Lift out the printer, place it on a stable surface, and remove the moisture-proof bag.
|
|
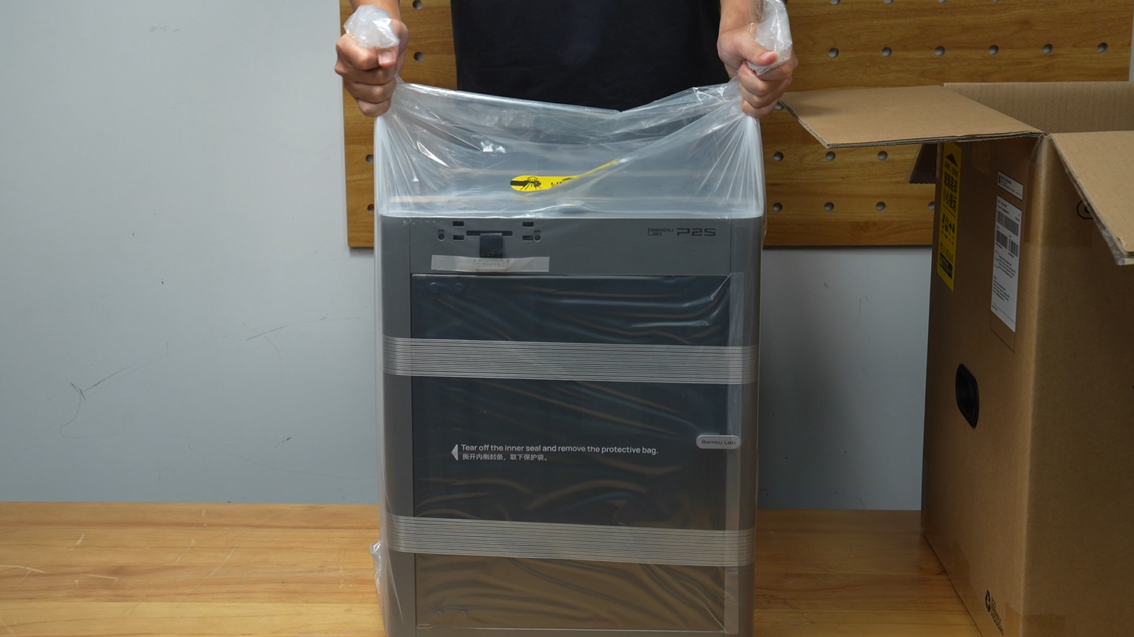
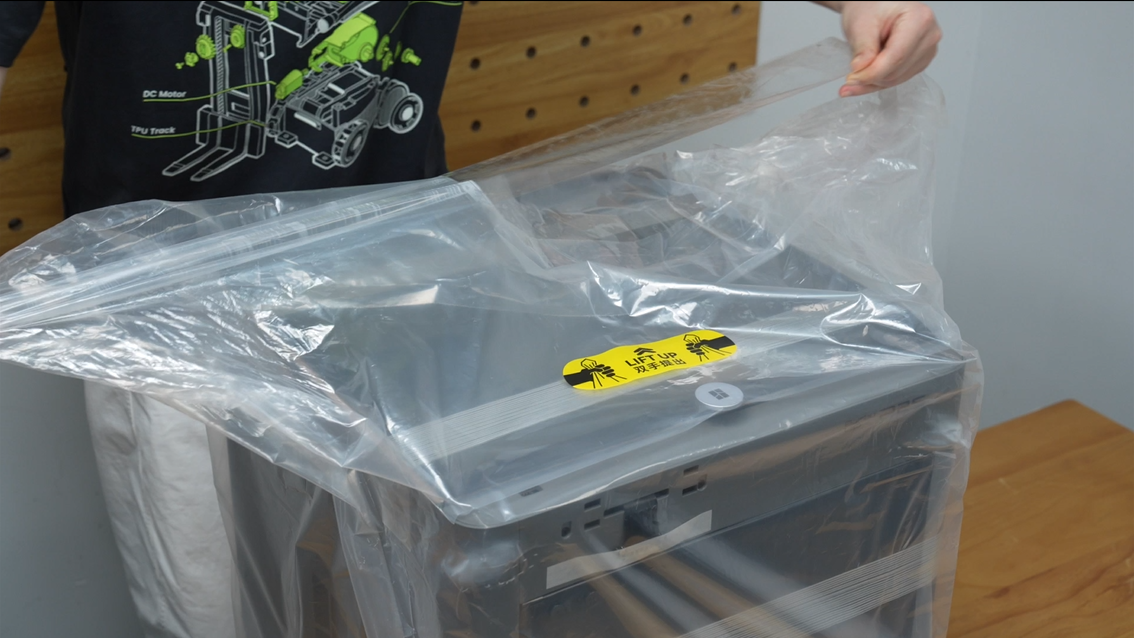
Remove the tape from the bottom of the side panels.
|
|
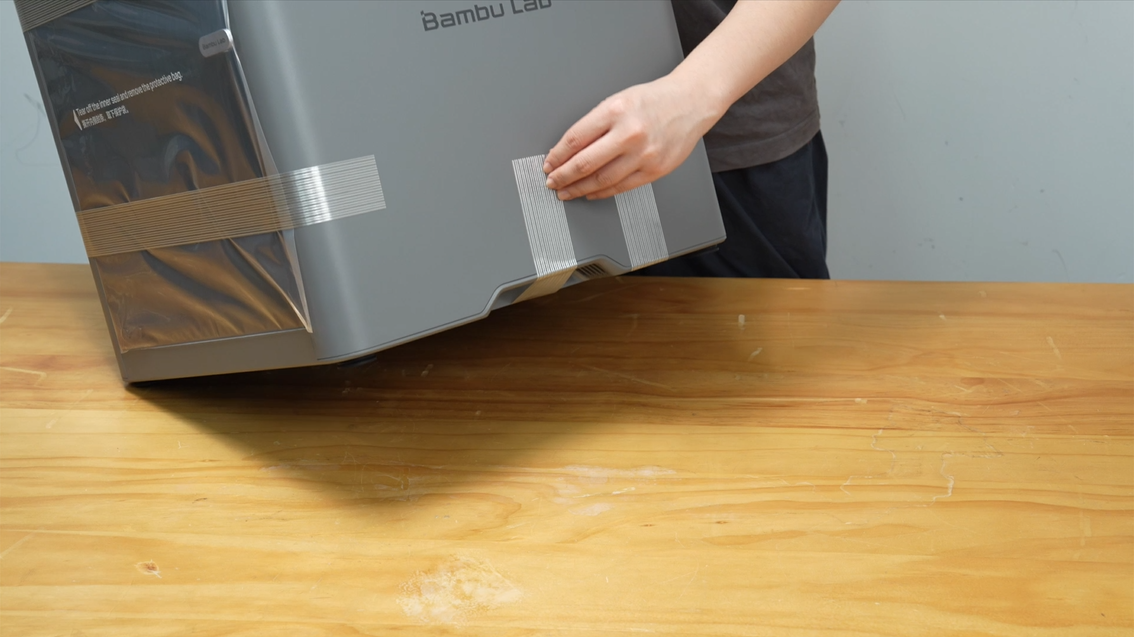
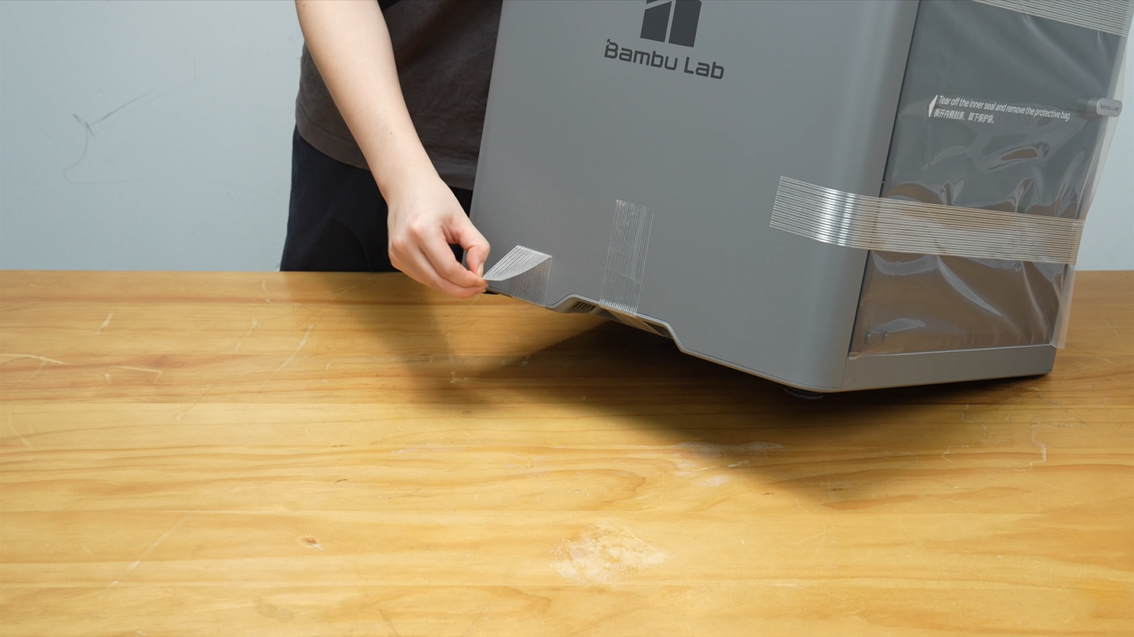
Failure to remove all tape from the bottom of the side panels may block cooling and affect printer performance.
Peel off the top tape, remove the glass top cover, and take off the protective bag.
|
|
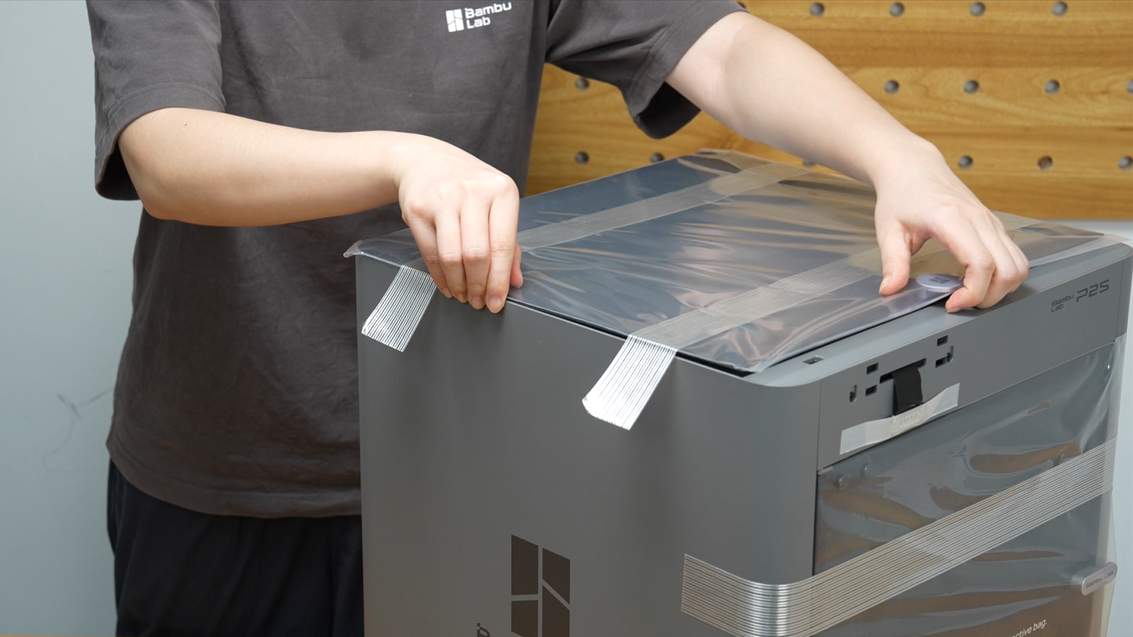
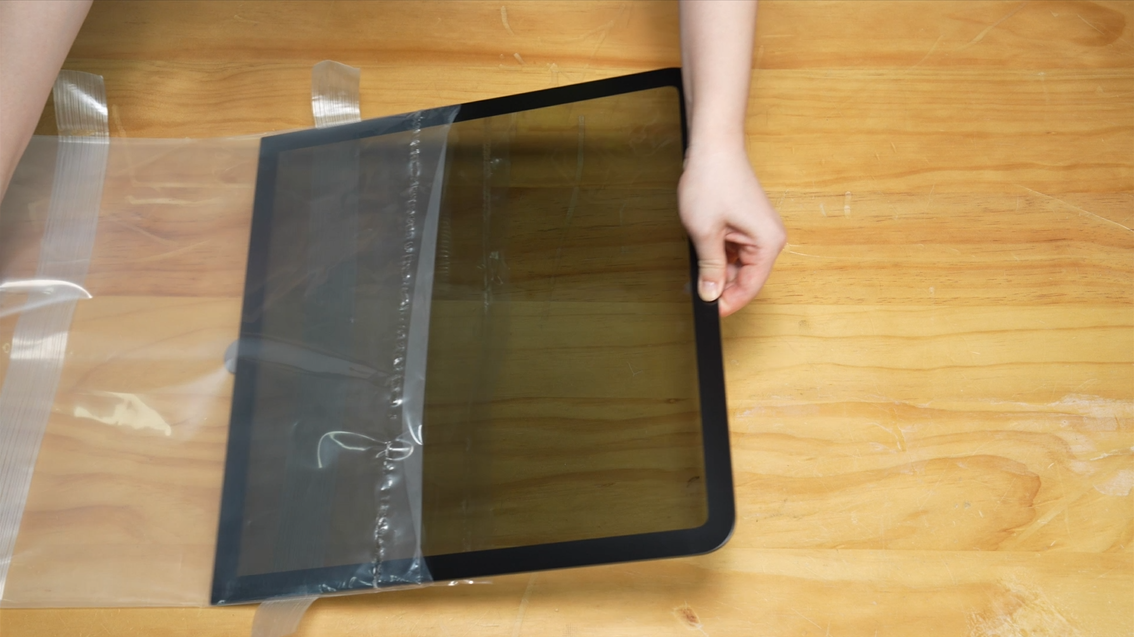
Peel off the tape on the front and remove the protective bag from the front door.
|
|
Step 2 - Take out Accessories
Take out all accessories and remove the cardboard.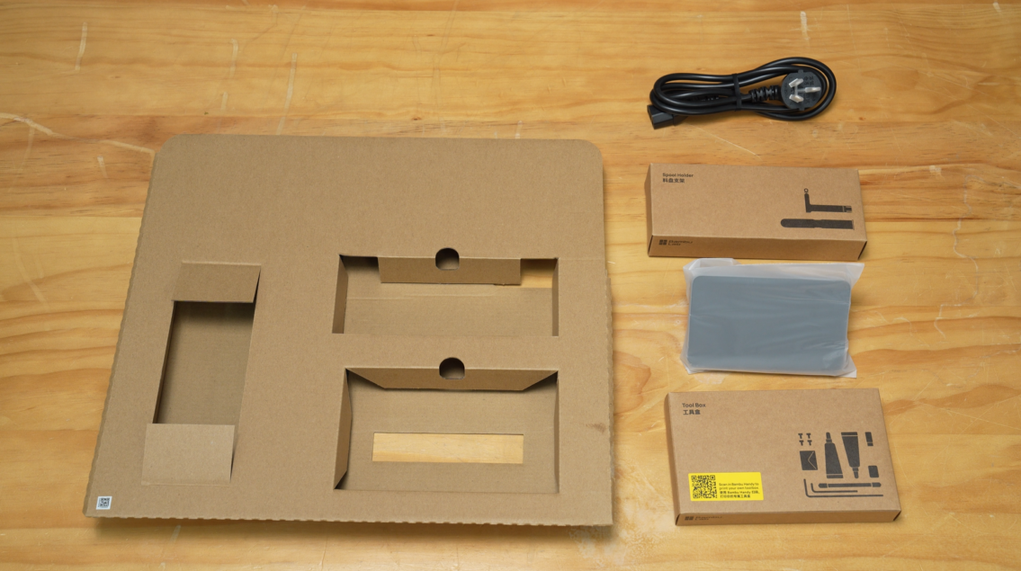
Step 3 - Remove Transport Materials
Use the H2.0 Allen key to remove the 3 screws marked in red.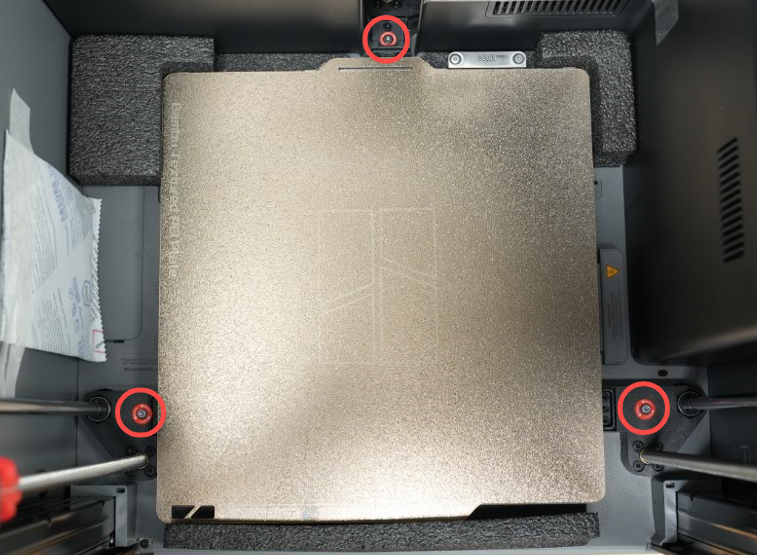
Note:When removing the heated bed fixing screws on the back of the printer, the screws may easily fall into the chassis. We recommend preparing a magnetic screwdriver, tweezers, or similar tools in advance to catch or retrieve the screws and prevent them from dropping into gaps inside the device.
Keep the foam around the heatbed in place until calibration is complete.
Remove the desiccant and tape inside the printer.
|
|
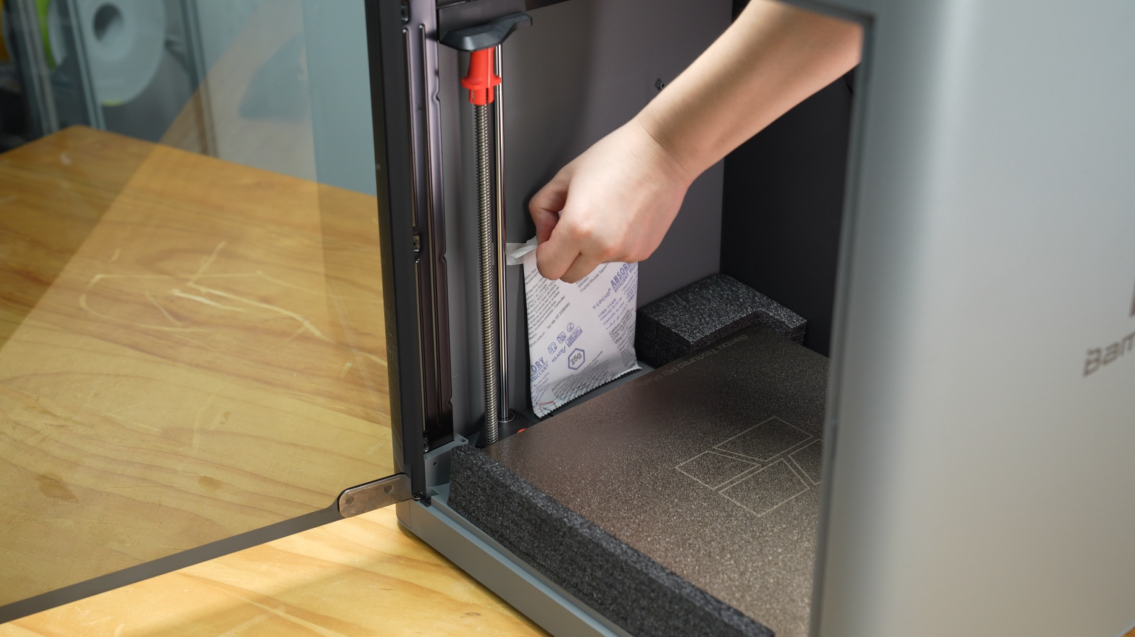
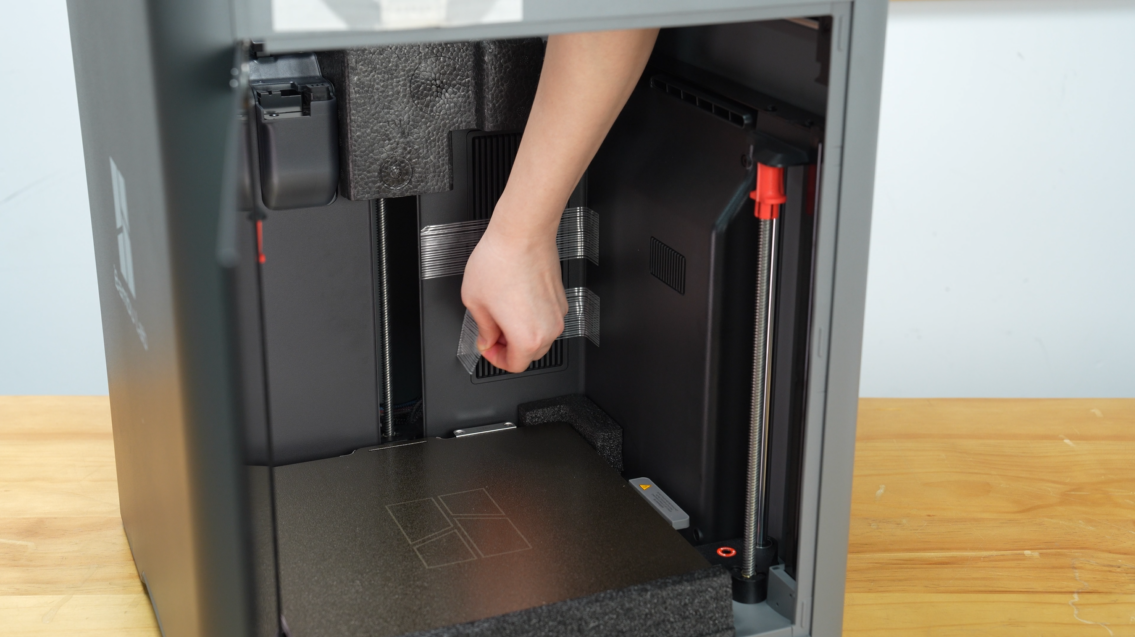
Pull down and remove the red plastic protectors from both lead screws.
|
|
Cut and remove all zip ties, move the toolhead forward, and remove the foam.
|
|
Step 4 - Install the Touchscreen
Remove the tape, then press the terminals on both sides of the cable and insert it into the screen port.
|
|
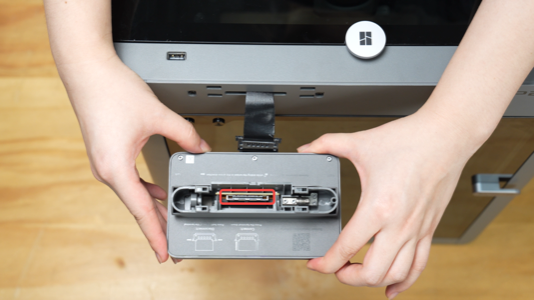
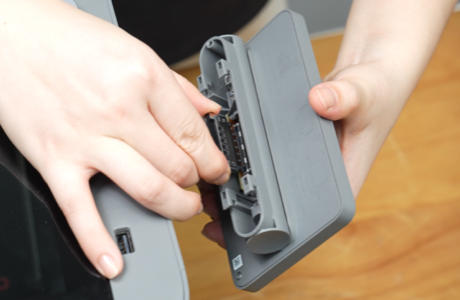
Push the flexible cable back into the printer slot. Then, insert the screen and slide it to the left to lock.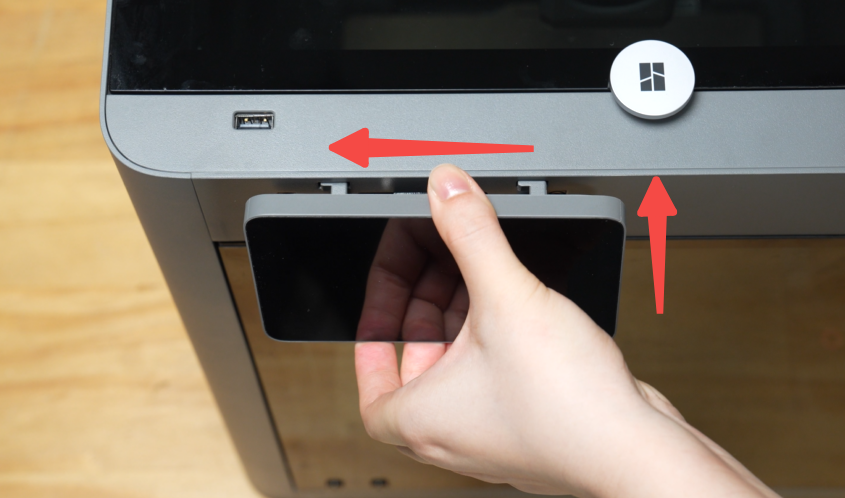
Step 5 - Install the Spool Holder Assembly
Slide the spool holder into the base plate until you hear a click.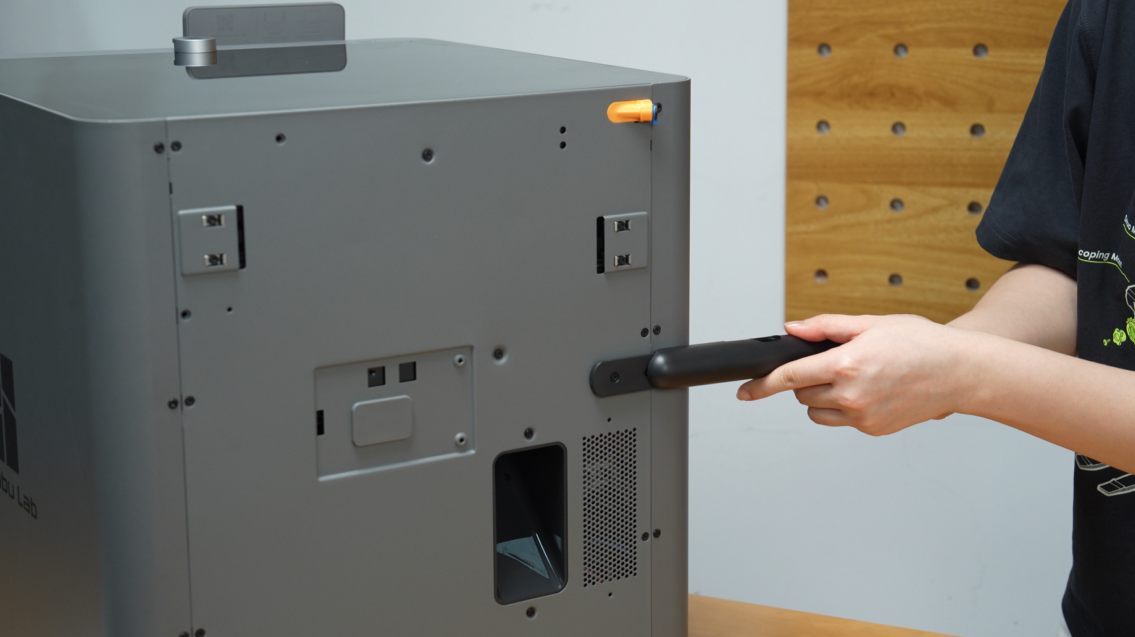
Insert the PTFE tube holder into the spool holder slot.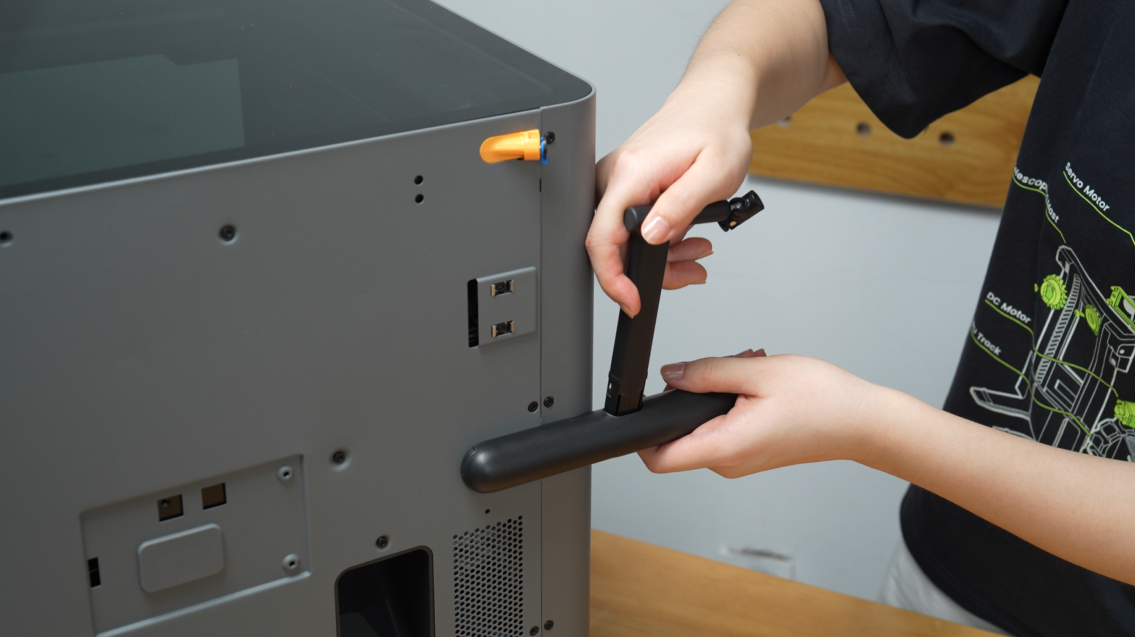
Insert the shorter PTFE tube into the tube couplers on the spool holder assembly and the printer.
|
|
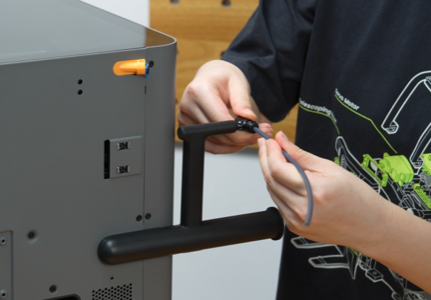
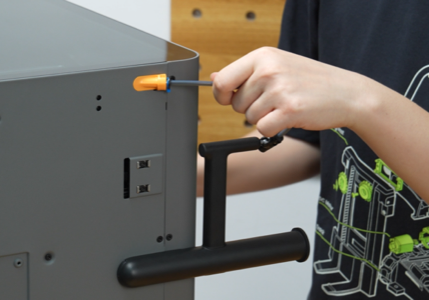
Reminder: When separating the spool holder, the first operation may be slightly laborious. It is recommended to shake the holder up and down first, then pull it out smoothly.

Step 6 - Power On and Calibrate
Plug in the power cable and turn on the printer.
|
|
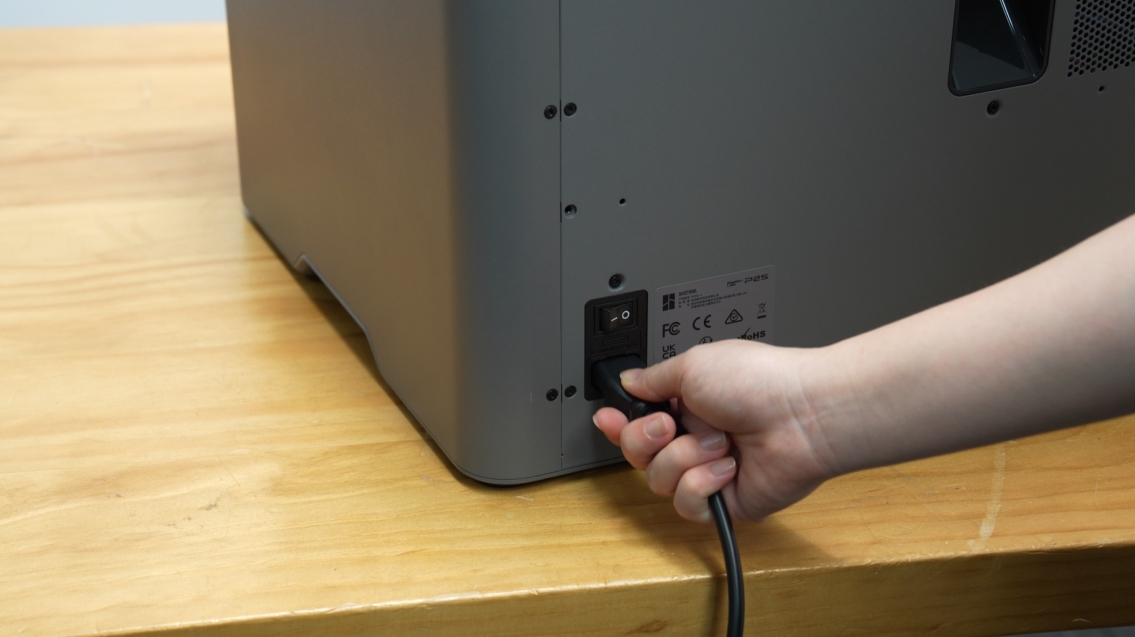
Follow the on-screen instructions to complete the initial calibration.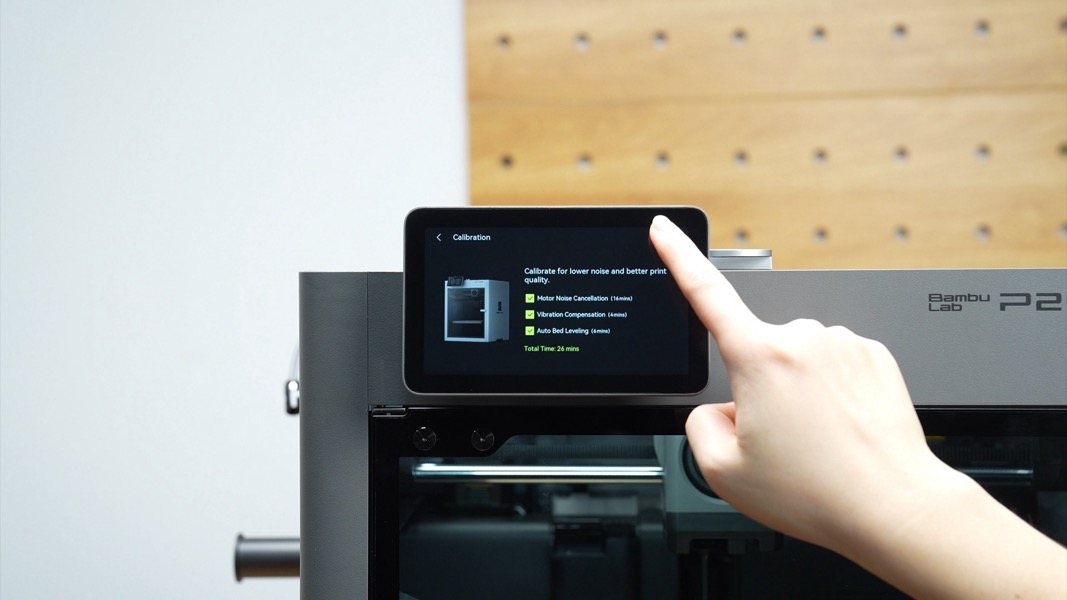
Before calibration, make sure that the build plate is properly placed on the heatbed.
After calibration, remove the foam under the heatbed.
|
|
Step 7 - Place a box or container to catch filament purges which fall from the chute
The small box which filament is shipped in is a great solution to this until a better alternative can be set up. Be sure to place the container below the rectangular purge chute opening at the back of the printer (example on a P1S pictured below).

A more permanent solution may be printed later by searching for an P2S purge container on MakerWorld.
Everything is ready! Please refer to P2S First Print to start your first print.